HTML & JavaScript
PART
1
: HTML
PART
2 : JAVA SCRIPT
Chapter 1 Creating
Simple JavaScript Programs
Chapter
2 Working with Larger Programs and Variables
Chapter
3 Working with Objects and Events
Chapter
4 Using Built-In Objects and Custom Objects
Chapter
5 Accessing Window Elements as Objects
Chapter
6 Using Interactive Forms
Chapter
7 Real-Life Examples I
Chapter
8 Improving a Web Page with JavaScript
Chapter
9 Using Frames, Cookies, and Other Advanced Features
Chapter
10 Working with Multiple Pages and Data
Chapter
11 Real-Life Examples II
Chapter
12 Working with Graphics in JavaScript
Chapter
13 Working with Multimedia and Plug-Ins
Chapter
14 Debugging JavaScript Programs
Chapter
15 Real-Life Examples III
Chapter
16 Integrating JavaScript with Java
Chapter
17 Combining JavaScript, CGI, and SSI
Chapter
18 Using ActiveX and Microsoft Internet Explorer 3.0
Chapter
19 Real-Life Examples IV
Chapter
20 The Future of JavaScript
Note: These
notes contain the overall knowledge of HTML on basic level and advance level
with JAVA script. Those who really wants to make their career in Information
Technology they can refer the whole chapter else learn and practice only the
basic tags and attributes.also the solved examples are included for your
understanding and reference.
Getting Started With HTML
Basics of HTML
HTML stands for Hyper Text Markup Language.
An HTML file is a text file containing markup tags. The markup tags tell
the Web browser how to display the page. An HTML file must have an
‘htm’ or ‘html’ file extension. An HTML file can be created using
a simple text editor. The rule-making body of the Web is World
Wide Web Consortium (W3C). W3C puts together specifications
for Web standards. The most essential Web standards are HTML,
CSS and XML. The latest HTML standard is XHTML 1.0.
HTML was created by Berners-Lee in late 1991
but "HTML 2.0" was the first standard HTML specification which was
published in 1995. HTML 4.01 was a major version of HTML and it was published
in late 1999. Though HTML 4.01 version is widely used but currently we are
having HTML-5 version which is an extension to HTML 4.01, and this version was
published in 2012.
Following
is the live examples of Web Pages designed by using the latest version of HTML
i.e HTML5.
Steps to Write First HTML Program:
Example: Creating a simple web
page
1. Start
Notepad.
2. Type in the
following text
<head>
<title>Title of
page</title>
</head>
<body>
This is a very basic
webpage. <b>This text will be displayed in bold</b>
</body>
</html>
3. Save
the file as "firstpage.html".
4. Double
click the saved file the browser will display the page.
Example
Explained:
The
first tag in your HTML document is <html>. This tag tells your browser
that this is the start of an HTML document. The last tag in your document is
</html>. This tag tells your browser that this is the end of the HTML
document.
The
text between the <head> tag and the </head> tag is header
information. Header information is not displayed in the browser window.
The
text between the <title> tags is the title of your document. The title is
displayed in your browser's caption.
The
text between the <body> tags is the text that will be displayed in your
browser.
The
text between the <b> and </b> tags will be displayed in a bold
font.
HTM
or HTML Extension?
When
you save an HTML file, you can use either the .htm or the .html extension. We
have used .html in our example.
Understanding World Wide Web
Today
information can be conveyed across vast distance with in second. Let us look at
how this is possible. With the goal of sharing information throughout the
world, Center European Research Nuclear, a center for high-energy physics in
Geneva, Switzerland, devised a technology known as World Wide Web.
The
World Wide Web is a vast amorphous blob of text, images, audio and video
scattered across networks and computers worldwide. It is shortly referred to as
“Web” or “W3”. Technically speaking, it is a software invention, which aids
users to explore the Internet facility. World Wide Web is a part of the
Internet comprising of Web pages and Web sites.
World
Wide Web is helpful in different ways to different users be it advertising,
information about current events or entertainment. It is both humorous and
informative. Institutions, Government Agencies, Business Organizations access
Web to barter information with millions of users by creating their own Web
pages. HTML (Hyper Text Markup Language) is significant here, as it is a simple
language to design and develop web pages.
Web
Page
Web
is a collection of Files known as web pages. These web pages can contain hyperlinks
to link other web pages. A hyperlink can be any text or image which when
clicked would display another web page. There may be one or more pages in the
home page, which is the initial web page present in a web site.
Uniform
Resource Locator (URL)
Uniform
Resource Locator is the primary naming scheme which is used to identify Web
resources that can either be HTML document or other services present in the
Web. These Web resources are identified with special names called Uniform
Resource Identifiers (URI). The URL is the standard method used to identify any
resource, for example – documents, graphics, Gopher menu and Usenet article any
ware on the Internet. URLs consist of service, Hostname and directory path Its
components are
Service :// hostname: port
/ directory - path
http://www.myinfo.com/index.html
Component Description
HTTP The
service is defined as HTTP, through which Web documents are transferred across
the Internet.
WWW
Is the name of the
web server.
Myinfo.com Indicates
the domain name for the web server where the web page resides.
Index.html Specifies
the file name.
Introduction
to HTML
HTML
stands for Hyper Text Markup Language, which is an application of Standard
Generalized Markup Language (SGML). It is a simple language used to define and
describe the layout of a web page. HTML also supports Multimedia and document
links.
What is H T M L?
ü Hyper is the
opposite of linear. It used to be that computer programs had to move in a
linear fashion. This before this, this before this, and so on. HTML does not
hold to that pattern and allows the person viewing the World Wide Web page to
go anywhere, any time they want.
ü Text is what you
will use. Real, honest to goodness English letters.
ü Mark up is what you
will do. You will write in plain English and then mark up what you wrote. More
to come on that in the next Primer.
ü Language because
they needed something that started with "L" to finish HTML and
Hypertext Markup Louie didn't flow correctly. Because it's a
language, really -- but the language is plain English.
You
will write the HTML document on the word processor, or Notepad, WordPad, or
Simple Text. When you are finished creating the HTML document, you'll then open
the document in a browser, like Netscape Navigator. The browser will interpret
the HTML commands for you and display the Web page.
HTML
documents must be text only. When you save an HTML document, you must save only
the text, nothing else.
How To Name Your Document
What
you name your document is very important. You must first give your document a
name and then add a suffix to it. That's the way everything works in HTML. You
give a name and then a suffix.
Follow
this format to name your document:-
- Choose
a name. Anything. If you have a PC not running Windows
95, you are limited to eight letters, however.
- Add
a suffix. For all HTML documents, you will add either ".htm" or
".html".
Points to remember
1) HTML stands for Hyper Text Markup Language
2) An HTML file is a text file
containing small markup tags
3) The markup tags tell the
Web browser how to display the page
4) An HTML file must have an .htm or
.html file extension
5) An HTML file can be created
using a simple text editor
HTML
Tags
- HTML
tags are used to mark-up HTML elements
- HTML
tags are surrounded by the two characters < and >
- The
surrounding characters are called angle brackets
- HTML
tags normally come in pairs like <b> and </b>
- The
first tag in a pair is the start tag, the second tag is
the end tag
- The
text between the start and end tags is the element content
- HTML
tags are not case sensitive, <b> means the same as
<B>
Basic
HTML Tags
<HTML> ... </HTML> Tag
This
element identifies the document as containing HTML elements.
The
HTML element is not visible upon HTML user agent rendering and can contain only
the <HEAD> and <BODY> elements.
Example: -
<HTML>
Here is all the rest of the document,
including any elements.
</HTML>
<HEAD> ... </HEAD> Tag
The
head of an HTML document is an unordered collection of information about the
document.
The
<HEAD> and </HEAD> elements do not directly affect the look of the
document when rendered.
<TITLE> ... </TITLE> Tag
<TITLE>-
Specifies the title of the document.
Every
HTML document must have a Title element. The title should be some
arbitrary string that identifies the contents of the document and may be used
in history lists, or as a label for the windows displaying the document.
The
Title element must occur within the head of the document and may not contain
anchors, paragraph elements, or highlighting. Only one title is
allowed in a document.
<BODY> ... </BODY> Tag
The
body of a HTML document contains all the text and images that make up the page,
together with all the HTML elements that provide the control/formatting of the
page
Example :-
<html>
<head>
<title>
My First Web Page </title>
</head>
<body>
Hello
friends
Welcome
to HTML.
This
is my first html document.
</body>
</html>
Tag
Attributes
Tags
can have attributes. Attributes can provide additional information
about the HTML elements on your page.
This
tag defines the body element of your HTML page: <body>. With an added
bgcolor attribute, you can tell the browser that the background color of your
page should be red, like this:
<body
bgcolor="red">.
Attributes
always come in name/value pairs like this: name="value".
Attributes
are always added to the start tag of an HTML element.
Attribute
values should always be enclosed in quotes. Double style quotes are the most
common, but single style quotes are also allowed.
In
some rare situations, like when the attribute value itself contains quotes, it
is necessary to use single quotes:
name='John
"ShotGun" Nelson'
Attributes of <BODY>
BGCOLOR
The
BGCOLOR attribute, allows setting of the background colour for the document.
Example :-
<BODY BGCOLOR="#rrggbb">
Document here
</BODY>
BACKGROUND
The
BACKGROUND attribute can be used to point to an image file that will be tiled
across the browser window, to provide a background for the
document. Specifying :
Example
:-
<BODY BACKGROUND="URL or
path/filename.gif">
Document here
</BODY>
TEXT
This
attribute is used to control the colour of all the normal text in the document.
Example :-
<BODY TEXT="#rrggbb">
Document here
</BODY>
LINK,
VLINK, and ALINK attributes
These
attributes allow control over the link text colouring. VLINK stands for visited
link, and ALINK stands for active link. The default colouring of these is:
LINK=blue (#0000FF), VLINK=purple (#400040), and ALINK=red (#FF0000).
Example :-
<BODY LINK="#rrggbb"
VLINK="#rrggbb" ALINK="#rrggbb">
Document here
</BODY>
Headings
HTML
defines six levels of heading. A Heading element implies all the font changes,
paragraph breaks before and after, and white space necessary to render the
heading.
Headings
are defined with the <h1> to <h6> tags. <h1> defines the
largest heading. <h6> defines the smallest heading.
<h1>This
is heading1</h1>
<h2>This
is heading2</h2>
<h3>This
is heading3</h3>
<h4>This
is heading4</h4>
<h5>This
is heading5</h5>
<h6>This
is heading6</h6>
ALIGN attribute
The
ALIGN = left | center | right attribute has been added to the <H1>
through to <H6> elements.
Example
:-
<H1 ALIGN=center>Hello, this is a
heading</H1>
HTML
automatically adds an extra blank line before and after a heading.
Paragraphs
The
Paragraph element indicates a paragraph. Typically, paragraphs are surrounded
by a vertical space of one line or half a line. With some browsers,
the first line in a paragraph is indented.
Paragraphs
are defined with the <p> tag.
<p>This
is a paragraph</p>
<p>This
is another paragraph</p>
ALIGN attribute
Basically,
ALIGN = left | center | right attributes have been added to the <P>
element.
Example
:-
<P ALIGN=LEFT> ... </P>
All
text within the paragraph will be aligned to the left side of the page layout.
This setting is equal to the default <P> element.
<P ALIGN=CENTER> ... </P>
All
text within the paragraph will be aligned to the centre of the page.
<P ALIGN=RIGHT> ... </P>
All
text within the paragraph will be aligned to the right side of the page.
HTML
automatically adds an extra blank line before and after a paragraph.
Line Breaks
The
Line Break element specifies that a new line must be started at the given
point. A new line indents the same as that of line-wrapped text.
The
<br> tag is used when you want to end a line, but don't want to start a
new paragraph. The <br> tag forces a line break wherever you place it.
Example
:-
<p>This <br> is a
para<br>graph with line breaks</p>
The
<br> tag is an empty tag. It has no closing tag.
Horizontal Rule
A
Horizontal Rule element is a divider between sections of text such as a full
width horizontal rule or equivalent graphic.
Horizontal
Rule defined with the <hr> tag
SIZE
attribute
The
SIZE attributes lets the author give an indication of how thick they wish the
horizontal rule to be. A pixel value should be given.
<HR
SIZE=number>
WIDTH
attribute
With
the WIDTH attribute, the author can specify an exact width in pixels, or a
relative width measured in percent of document width.
<HR
WIDTH=number | percent>
ALIGN
attribute
Now
that horizontal rules do not have to be the width of the page it possible to
specify the horizontal alignment of the rule.
<HR
ALIGN=left | right | center>
COLOR
attribute
Internet
Explorer allows the specifying of the hard rule colour. Accepted
values are any of the Explorer supported colour names, or any acceptable rrggbb
hex triplet.
<HR
COLOR=name|#rrggbb>
NOSHADE
attribute
For
those times when a solid bar is required, the NOSHADE attribute specifies that
the horizontal rule should not be shaded at all.
<HR
NOSHADE>
Comments in HTML
The
comment tag is used to insert a comment in the HTML source code. A comment will
be ignored by the browser. You can use comments to explain your code, which can
help you when you edit the source code at a later date.
Example
:-
<!-- This is a comment -->
Points to remember
Tag
|
Description
|
<html>
|
Defines
an HTML document
|
<head>
|
Defines
the document's header
|
<title>
|
Specifies
the title of the document
|
<body>
|
Defines
the document's body
|
<h1>
to <h6>
|
Defines
header 1 to header 6
|
<p>
|
Defines
a paragraph
|
<br>
|
Inserts
a single line break
|
<hr>
|
Defines
a horizontal rule
|
<!-->
|
Defines
a comment
|
Text
Formatting Tags
<B> ... </B> Tag
The
Bold element specifies that the text should be rendered in boldface, where
available. Otherwise, alternative mapping is allowed.
Example
:-
The instructions <B>must be
read</B> before continuing.
<BIG> ... </BIG> Tag
The
<BIG> element specifies that the enclosed text should be displayed, if
practical, using a big font (compared with the current font).
Example :-
This is normal text, with <BIG>this
bit</BIG> being big text.
<EM> ... </EM> Tag
The
Emphasis element indicates typographic emphasis, typically rendered as italics.
Example :-
The <EM>Emphasis</EM> element
typically renders as Italics.
<I> ... </I> Tag
The
Italic element specifies that the text should be rendered in italic font, where
available. Otherwise, alternative mapping is allowed.
Example :-
Anything between the <I>I
elements</I> should be italics.
<SMALL> ... </SMALL> Tag
The
<SMALL> element specifies that the enclosed text should be displayed, if
practical, using a small font (compared with the current font).
Example
:-
This
is normal text, with <SMALL>this bit</SMALL> being small text.
<STRONG> ... </STRONG> Tag
The
Strong element indicates strong typographic emphasis, typically rendered in
bold.
Example :-
The
instructions <STRONG>must be read</STRONG> before continuing.
<SUB> ... </SUB> Tag
The
<SUB> element specifies that the enclosed text should be displayed as a
subscript, and if practical, using a smaller font (compared with normal text).
Example :-
This is the main text, with <SUB>this
bit</SUB> being subscript.
<SUP> ... </SUP> Tag
The
<SUP> element specifies that the enclosed text should be displayed as a
superscript, and if practical, using a smaller font (compared with normal
text).
Example :-
This is the main text, with <SUP>this
bit</SUP> being superscript.
<STRIKE> ... </STRIKE> Tag
The
<STRIKE> ... </STRIKE> element states that the enclosed text should
be displayed with a horizontal line striking through the
text. Alternative mappings are allowed if this is not practical.
NOTE: - The actual element
detailed in HTML specifications, is <S> ... </S>, which is also
supported by the three browsers
Example :-
This text would be <STRIKE>struck
through</STRIKE>
<U> ... </U> Tag
The
<U> ... </U> Elements state that the enclosed text should be
rendered, if practical, underlined. This is an HTML 3.0 element and
may not be widely supported.
Example:
-
The <U>main point</U> of the
exercise...
Points to remember
Tag
|
Description
|
<b>
|
Defines
bold text
|
<big>
|
Defines
big text
|
<em>
|
Defines
emphasized text
|
<i>
|
Defines
italic text
|
<small>
|
Defines
small text
|
<strong>
|
Defines
strong text
|
<sub>
|
Defines
subscripted text
|
<sup>
|
Defines
superscripted text
|
<s>
|
Defines
horizontal line striking through the text
|
<strike>
|
Defines
horizontal line striking through the text
|
<u>
|
Defines
underlined text
|
"Computer
Output" Tags
<PRE> ... </PRE> Tag
The
Preformatted Text element presents blocks of text in fixed-width font, and so
is suitable for text that has been formatted on screen.
WIDTH
attribute
The
<PRE> element may be used with the optional WIDTH attribute, which is a
Level 1 feature. The WIDTH attribute specifies the maximum number of characters
for a line and allows the HTML user agent to select a suitable font and
indentation. If the WIDTH attribute is not present, a width of 80 characters is
assumed. Where the WIDTH attribute is supported, widths of 40, 80 and 132
characters should be presented optimally, with other widths being rounded up.
Within
preformatted text:
- Line breaks within the text are rendered as a move to the beginning of the next line.
- The <P> element should not be used. If found, it should be rendered as a move to the beginning of the next line.
- Anchor elements and character highlighting elements may be used.
- Elements that define paragraph formatting (headings, address, etc.) must not be used.
- The
horizontal tab character (encoded in US-ASCII and ISO-8859-1 as decimal 9)
must be interpreted as the smallest positive nonzero number of spaces
which will leave the number of characters so far on the line as a multiple
of 8. Its use is not recommended however.
Example :-
<PRE WIDTH="80">
This is an example line.
</PRE>
<CODE> ... </CODE> Tag
The
Code element indicates an example of code; typically rendered as monospaced .
Do not confuse with the Preformatted Text element.
Example: -
This sentence contains an <CODE>example
of code</CODE>.
<KBD> ... </KBD> Tag
The
Keyboard element indicates text typed by a user; typically rendered as
monospaced . It might commonly be used in an instruction manual.
Example :-
The
text inside the <KBD>KBD element, would typically</KBD> render as
monospaced font.
<SAMP> ... </SAMP> Tag
The
Sample element indicates a sequence of literal characters; typically rendered
as monospaced.
Example :-
A
sequence of <SAMP>literal characters</SAMP> commonly renders as
monospaced font.
<TT>
... </TT> Tag
The
Teletype element specifies that the text should be rendered in fixed-width
typewriter font.
Example :-
Text
between the <TT> typetype elements</TT> should be rendered in fixed
width typewriter font.
<LISTING> ... </LISTING> Tag
The
<LISTING> element can be used to present blocks of text in fixed-width
font, and so is suitable for text that has been formatted on
screen. As such, it is similar to the <PRE> and
<XMP> elements, but has a different syntax.
Typically,
it will render
as
fixed width font with white space separating it from other text. It
should be rendered such that 132 characters fit on the line. NOTE : Only
Netscape actually complies with this
Example :-
Some
might say<LISTING>that sunshine</LISTING> follows thunder
<PLAINTEXT> Tag
The
<PLAINTEXT> element can be used to represent formatted
text. As such, it is similar to the <XMP> and <LISTING>
element. However, the <PLAINTEXT> element should be an open
element, with no closing element. Only Netscape supports this
element according to any HTML specification. Internet Explorer and
Mosaic will both allow the use of a </PLAINTEXT> closing
element. Netscape will treat the closing element as straight text.
Typically,
it will render as fixed width font with white space separating it from other
text.
Example
:-
We live<PLAINTEXT>as we breathe alone
<XMP> ... </XMP> Tag
The
<XMP> element can be used to presents blocks of text in fixed-width font,
and so is suitable for text that has been formatted on screen. As
such, it is similar to the <PRE> and <LISTING> elements, but has a
different syntax.
Typically,
it will render as fixed width font with white space separating it from other
text. It should be rendered such that 80 characters fit on the line.
Example :-
The
<XMP>Netscape Navigator</XMP> doesn't support coloured tables.
Citations,
Quotations, and Definition Tags
<ADDRESS> ... </ADDRESS> Tag
The
Address element specifies such information as address, signature and
authorship, often at the top or bottom of a document.
Typically,
an Address is rendered in an italic typeface and may be indented. It
carries an implied paragraph break before and after the text enclosed.
Example
:-
<ADDRESS>
Mr. Cosmic Kumquat<BR>
SSL Trusters Inc.<BR>
1234 Squeamish Ossifrage Road<BR>
Anywhere<BR>
NY 12345<BR>
U.S.A.
</ADDRESS>
<BLOCKQUOTE> ...
</BLOCKQUOTE> Tag
The
BLOCKQUOTE element is used to contain text quoted from another source.
A
typical rendering would be a slight extra left and right indent, and/or italic
font. The BLOCKQUOTE element causes a paragraph break, and typically provides
space above and below the quote.
Example
:-
I think the poem ends
<BLOCKQUOTE>
<P>Soft
you now, the fair Ophelia. Nymph, in thy orisons, be all my sins
remembered.
</BLOCKQUOTE>
but I am not sure.
<CITE> ... </CITE> Tag
The
Citation element specifies a citation; typically rendered as italics.
Example
:-
This sentence, containing a
<CITE>citation reference</CITE>
<DFN> ... </DFN> Tag
The
<DFN> element can be used to mark the Defining Instance of a
term. For example, the first time some text is mentioned in a
paragraph. Typically, it will render italicised.
Example
:-
The <DFN>Internet Explorer</DFN>
is Microsoft's Web browser.
Points to remember
Tag
|
Description
|
<code>
|
Defines
computer code text
|
<kbd>
|
Defines
keyboard text
|
<samp>
|
Defines
sample computer code
|
<tt>
|
Defines
teletype text
|
<var>
|
Defines
a variable
|
<pre>
|
Defines
preformatted text
|
<listing>
|
Deprecated.
Use <pre> instead
|
<plaintext>
|
Deprecated.
Use <pre> instead
|
<xmp>
|
Deprecated.
Use <pre> instead
|
Tag
|
Description
|
<abbr>
|
Defines
an abbreviation
|
<acronym>
|
Defines
an acronym
|
<address>
|
Defines
an address element
|
<bdo>
|
Defines
the text direction
|
<blockquote>
|
Defines
a long quotation
|
<q>
|
Defines
a short quotation
|
<cite>
|
Defines
a citation
|
<dfn>
|
Defines
a definition term
|
Exercise1 :-
Text
formatting
This example demonstrates how you can format text in an HTML document.
This example demonstrates how you can format text in an HTML document.
<html>
<body>
<b>This
text is bold</b>
<br>
<strong>
This
text is strong
</strong>
<br>
<big>
This
text is big
</big>
<br>
<em>
This
text is emphasized
</em>
<br>
<i>
This
text is italic
</i>
<br>
<small>
This
text is small
</small>
<br>
This
text contains
<sub>
subscript
</sub>
<br>
This
text contains
<sup>
superscript
</sup>
</body>
</html>
Exercise2
:-
Preformatted
text
This example demonstrates how you can control the line breaks and spaces with the pre tag.
This example demonstrates how you can control the line breaks and spaces with the pre tag.
<html>
<body>
<pre>
This
is
preformatted
text.
It
preserves both spaces
and
line breaks.
</pre>
<p>The
pre tag is good for displaying computer code:</p>
<pre>
for
i = 1 to 10
print
i
next
i
</pre>
</body>
</html>
Exercise3
:-
"Computer
output" tags
This example demonstrates how different "computer output" tags will be displayed.
This example demonstrates how different "computer output" tags will be displayed.
<html>
<body>
<code>Computer
code</code>
<br>
<kbd>Keyboard
input</kbd>
<br>
<tt>Teletype
text</tt>
<br>
<samp>Sample
text</samp>
<br>
<var>Computer
variable</var>
<br>
<p>
<b>Note:</b>
These tags are often used to display computer/programming code.
</p>
</body>
</html>
Exercise4
:-
Address
This example demonstrates how to write an address in an HTML document.
This example demonstrates how to write an address in an HTML document.
<html>
<body>
<address>
Donald
Duck<br>
BOX
555<br>
Disneyland<br>
USA
</address>
</body>
</html>
Exercise5
:-
Abbreviations
and acronyms
This example demonstrates how to handle an abbreviation or an acronym.
This example demonstrates how to handle an abbreviation or an acronym.
<html>
<body>
<abbr
title="United Nations">UN</abbr>
<br>
<acronym
title="World Wide Web">WWW</acronym>
<p>The
title attribute is used to show the spelled-out version when holding the mouse
pointer over the acronym or abbreviation.</p>
<p>This
only works for the acronym element in IE 5.</p>
<p>This
works for both the abbr and acronym element in Netscape 6.2.</p>
</body>
</html>
Exercise6
:-
Text
direction
This example demonstrates how to change the text direction.
This example demonstrates how to change the text direction.
<html>
<body>
<p>
If
your browser supports bi-directional override (bdo), the next line will be
written from the right to the left (rtl):
</p>
<bdo
dir="rtl">
Here
is some Hebrew text
</bdo>
</body>
</html>
Exercise7
:-
Quotations
This example demonstrates how to handle long and short quotations.
This example demonstrates how to handle long and short quotations.
<html>
<body>
Here
comes a long quotation:
<blockquote>
This
is a long quotation. This is a long quotation. This is a long quotation. This
is a long quotation. This is a long quotation.
</blockquote>
Here
comes a short quotation:
<q>
This
is a short quotation
</q>
<p>
With
the block quote element, the browser inserts line breaks and margins, but the q
element does not render as anything special.
</p>
</body>
</html>
Exercise8
:-
Deleted
and inserted text
This example demonstrates how to mark a text that is deleted or inserted to a document.
This example demonstrates how to mark a text that is deleted or inserted to a document.
<html>
<body>
<p>
a
dozen is
<del>twenty</del>
<ins>twelve</ins>
pieces
</p>
<p>
Most
browsers will overstrike deleted text and underline inserted text.
</p>
<p>
Some
older browsers will display deleted or inserted text as plain text.
</p>
</body>
</html>
The Image Tag
The
Image element is used to incorporate in-line graphics into an HTML document.
This element cannot be used for embedding other HTML text.
In
HTML, images are defined with the <img> tag. The <img>
tag is empty, which means that it contains attributes only and it has no
closing tag.
The
SRC Attribute
To
display an image on a page, you need to use the src attribute. Src stands for
"source". The value of the src attribute is the URL of the image you
want to display on your page.
Syntax :-
<img
src="url">
The
ALT Attribute
The
alt attribute is used to define an "alternate text" for an image. The
value of the alt attribute is an author-defined text:
The
"alt" attribute tells the reader what he or she is missing on a page
if the browser can't load images. The browser will then display the alternate
text instead of the image.
Example :-
<img
src="boat.gif" alt="Big Boat">
The
WIDTH and HEIGHT Attributes
If
the WIDTH and HEIGHT attributes are used, the viewer of their document will not
have to wait for the image to be loaded and its size calculated. The
browser can determine the layout of the text around the image and display the
text first.
Example :-
<img
src="boat.gif" alt="Big Boat" width=50 height=50>
The
BORDER Attribute
This
lets the document author control the thickness of the border around an image
displayed. This can be set to 0 so that if the image is surrounded
by <A> elements, the normal link border will not be shown.
Syntax :-
<IMG
BORDER=value>
The VSPACE and HSPACE Attributes
The
VSPACE attribute controls the vertical space above and below the image, while
HSPACE controls the horizontal space to the left and right of the
image. They allow setting of a 'margin' around the image which is
kept as white space - useful to prevent text wrapping right up to floating
images.
Syntax :-
<IMG
VSPACE=value HSPACE=value>
The ALIGN Attribute
ALIGN=left
image will float the image to the left margin (into the next available space
there), and subsequent text will wrap around the right hand side of that image.
ALIGN=right
will align the image aligns with the right margin, and the text wraps around
the left.
ALIGN=top
aligns itself with the top of the tallest item in the line.
ALIGN=texttop
aligns itself with the top of the tallest text in the line (this is usually but
not always the same as ALIGN=top).
ALIGN=middle
aligns the baseline of the current line with the middle of the image.
ALIGN=absmiddle
aligns the middle of the current line with the middle of the image.
ALIGN=baseline
aligns the bottom of the image with the baseline of the current line.
ALIGN=bottom
aligns the bottom of the image with the baseline of the current line.
ALIGN=absbottom
aligns the bottom of the image with the bottom of the current line.
Syntax :-
<
IMG ALIGN= left | right | top | texttop | middle | absmiddle | baseline |
bottom | absbottom >
Exercise
1 : -
Insert
images
This example demonstrates how to display images in your Web page.
This example demonstrates how to display images in your Web page.
<html>
<body>
<p>
An
image:
<img
src="constr4.gif"
width="144"
height="50">
</p>
<p>
A
moving image:
<img
src="hackanm.gif"
width="48"
height="48">
</p>
<p>
Note
that the syntax of inserting a moving image is no different from that of a
non-moving image.
</p>
</body>
</html>
Exercise 2 : -
Insert
images from different locations
This example demonstrates how to display images from another folder or another server in your Web page.
This example demonstrates how to display images from another folder or another server in your Web page.
<html>
<body>
<p>
An
image from another folder:
<img
src="/images/netscape.gif"
width="33"
height="32">
</p>
<p>
An
image from W3Schools:
<img
src="http://www.w3schools.com/images/ie.gif" width="73"
height="68">
</p>
</body>
</html>
Exercise 3 : -
Background
image
This example demonstrates how to add a background image to an HTML page.
This example demonstrates how to add a background image to an HTML page.
<html>
<body
background="background.jpg">
<h3>Look:
A background image!</h3>
<p>Both
gif and jpg files can be used as HTML backgrounds.</p>
<p>If
the image is smaller than the page, the image will repeat itself.</p>
</body>
</html>
Exercise
4 : -
Aligning
images
This example demonstrates how to align an image within the text.
This example demonstrates how to align an image within the text.
<html>
<body>
<p>
An
image
<img
src="hackanm.gif"
align="bottom"
width="48" height="48">
in
the text
</p>
<p>
An
image
<img
src ="hackanm.gif"
align="middle"
width="48" height="48">
in
the text
</p>
<p>
An
image
<img
src ="hackanm.gif"
align="top"
width="48" height="48">
in
the text
</p>
<p>Note
that bottom alignment is the default alignment</p>
<p>
An
image
<img
src ="hackanm.gif"
width="48"
height="48">
in
the text
</p>
<p>
<img
src ="hackanm.gif"
width="48"
height="48">
An
image before the text
</p>
<p>
An
image after the text
<img
src ="hackanm.gif"
width="48"
height="48">
</p>
</body>
</html>
Exercise 5 : -
Let
the image float
This example demonstrates how to let an image float to the left or right of a paragraph.
This example demonstrates how to let an image float to the left or right of a paragraph.
<html>
<body>
<p>
<img
src ="hackanm.gif"
align
="left" width="48" height="48">
A
paragraph with an image. The align attribute of the image is set to
"left". The image will float to the left of this text.
</p>
<p>
<img
src ="hackanm.gif"
align
="right" width="48" height="48">
A
paragraph with an image. The align attribute of the image is set to
"right". The image will float to the right of this text.
</p>
</body>
</html>
Exercise 6 : -
Adjust
images to different sizes
This example demonstrates how to adjust images to different sizes.
This example demonstrates how to adjust images to different sizes.
<html>
<body>
<p>
<img
src="hackanm.gif"
width="20"
height="20">
</p>
<p>
<img
src="hackanm.gif"
width="45"
height="45">
</p>
<p>
<img
src="hackanm.gif"
width="70"
height="70">
</p>
<p>
You
can make a picture larger or smaller changing the values in the
"height" and "width" attributes of the
img
tag.
</p>
</body>
</html>
Exercise 7 : -
Display
an alternate text for an image
This example demonstrates how to display an alternate text for an image.
This example demonstrates how to display an alternate text for an image.
<html>
<body>
<img
src="goleft.gif" alt="Go Left" width="32"
height="32">
<p>
Text-only
browsers cannot display images and will only display the text that is specified
in the "alt" attribute for the image. Here, the "alt"-text
is "Go Left".</p>
<p>
Note
that if you hold the mouse pointer over the image, most browsers will display
the "alt"-text.
</p>
</body>
</html>
The Anchor Tag
The
Anchor element is the essence of HTML. It is marked text that is the
start and/or destination of a hypertext link. HTML uses the <a> (anchor)
tag to create a link to another document. An anchor can point to any resource
on the Web: an HTML page, an image, a sound file, a movie, etc.
This
element accepts several attributes, but either the NAME or HREF attribute is
required.
The HREF Attribute
The
<a> tag is used to create an anchor to link from, the href attribute is
used to address the document to link to, and the words between the open and
close of the anchor tag will be displayed as a hyperlink.
Syntax
:-
<a
href="url">Text to be displayed</a>
The NAME Attribute
The
name attribute is used to create a named anchor. When using named anchors we
can create links that can jump directly into a specific section on a page,
instead of letting the user scroll around to find what he/she is looking for.
Syntax :-
<a
name="label">Text to be displayed</a>
The Target Attribute
Browser
windows can now have names associated with them. Links in any window
can refer to another window by name. With the target attribute, you can
define where the linked document will be opened.
Syntax :-
<A
HREF="url.html" TARGET="window_name">Link text</A>
Exercise 1 : -
Create
hyperlinks
This example demonstrates how to create links in an HTML document.
This example demonstrates how to create links in an HTML document.
<html>
<body>
<p>
<a
href="lastpage.htm">
This
text</a> is a link to a page on
this
Web site.
</p>
<p>
<a
href="http://www.microsoft.com/">
This
text</a> is a link to a page on
the
World Wide Web.
</p>
</body>
</html>
Exercise 2 : -
An
image as a link
This
example demonstrates how to use an image as a link.
<html>
<body>
<p>
You
can also use an image as a link:
<a
href="lastpage.htm">
<img
border="0" src="buttonnext.gif" width="65"
height="38">
</a>
</p>
</body>
</html>
Exercise 3 : -
Open
a link in a new browser window
This example demonstrates how to link to another page by opening a new window, so that the visitor does not have to leave your Web site.
This example demonstrates how to link to another page by opening a new window, so that the visitor does not have to leave your Web site.
<html>
<body>
<a
href="lastpage.htm" target="_blank">Last Page</a>
<p>
If
you set the target attribute of a link to "_blank",
the
link will open in a new window.
</p>
</body>
</html>
Exercise 4 : -
Link
to a location on the same page
This
example demonstrates how to use a link to jump to another part of a document.
<html>
<body>
<p>
<a
href="#C4">
See
also Chapter 4.
</a>
</p>
<p>
<h2>Chapter
1</h2> <p>This chapter explains ba bla bla</p>
<h2>Chapter
2</h2> <p>This chapter explains ba bla bla</p>
<h2>Chapter
3</h2> <p>This chapter explains ba bla bla</p>
<a
name="C4"><h2>Chapter 4</h2></a>
<p>This
chapter explains ba bla bla</p>
<h2>Chapter
5</h2> <p>This chapter explains ba bla bla</p>
<h2>Chapter
6</h2> <p>This chapter explains ba bla bla</p>
<h2>Chapter
7</h2> <p>This chapter explains ba bla bla</p>
<h2>Chapter
8</h2> <p>This chapter explains ba bla bla</p>
<h2>Chapter
9</h2> <p>This chapter explains ba bla bla</p>
<h2>Chapter
10</h2> <p>This chapter explains ba bla bla</p>
<h2>Chapter
11</h2> <p>This chapter explains ba bla bla</p>
<h2>Chapter
12</h2> <p>This chapter explains ba bla bla</p>
<h2>Chapter
13</h2> <p>This chapter explains ba bla bla</p>
<h2>Chapter
14</h2> <p>This chapter explains ba bla bla</p>
<h2>Chapter
15</h2> <p>This chapter explains ba bla bla</p>
<h2>Chapter
16</h2> <p>This chapter explains ba bla bla</p>
<h2>Chapter
17</h2> <p>This chapter explains ba bla bla</p>
</body>
</html>
Exercise 5 : -
Break
out of a frame
This
example demonstrates how to break out of a frame, if your site is locked in a
frame.
<html>
<body>
<p>Locked
in a frame?</p>
<a
href="http://www.nareshit.com/"
target="_top">Click
here!</a>
</body>
</html>
Exercise 6 : -
Create
a mailto link
This
example demonstrates how to link to a mail message (will only work if you have
mail installed).
<html>
<body>
<p>
This
is a mail link:
<a
href="mailto:someone@microsoft.com?subject=Hello%20again">
Send
Mail</a>
</p>
<p>
<b>Note:</b>
Spaces between words should be replaced by %20 to <b>ensure</b>
that the browser will display your text properly.
</p>
</body>
</html>
Exercise 7 : -
Create
a mailto link 2
This example demonstrates a more complicated mailto link.
This example demonstrates a more complicated mailto link.
<html>
<body>
<p>
This
is another mailto link:
<a
href="mailto:someone@microsoft.com?cc=someoneelse@microsoft.com&bcc=andsomeoneelse2@microsoft.com&subject=Summer%20Party&body=You%20are%20invited%20to%20a%20big%20summer%20party!">Send
mail!</a>
</p>
<p>
<b>Note:</b>
Spaces between words should be replaced by %20 to <b>ensure</b>
that the browser will display your text properly.
</p>
</body>
</html>
Client
Side Image Maps
<map>….</map> Tag
The
different regions of the image are described using a MAP
element. The map describes each region in the image and indicates
where it links to. The basic format for the MAP element is as
follows:
<MAP
NAME="name">
<AREA
[SHAPE="shape"] COORDS="x,y,..."
[HREF="reference"] [NOHREF]>
</MAP>
The
MAP definition can reside in the same file as the image that will use it, or in
a completely separate file. This way, all map definitions can be
kept separate from the main documents, allowing easier maintenance.
The
NAME Attribute
The
NAME specifies the name of the map so that it can be referenced by an
<IMG> element.
<area> Tag
An
arbitrary number of AREA tags may be specified. If two areas
intersect, the one which appears first in the map definition takes precedence
in the overlapping region. For example, a button bar in a document might use a
160 pixel by 60 pixel image and appear like this:
<MAP
NAME="buttonbar">
<AREA
SHAPE="RECT" COORDS="10,10,49,49"
HREF="about_us.html">
<AREA
SHAPE="RECT" COORDS="60,10,99,49"
HREF="products.html">
<AREA
SHAPE="RECT" COORDS="110,10,149,49"
HREF="index.html">
<AREA
SHAPE="RECT" COORDS="0,0,159,59" NOHREF>
</MAP>
Any
region of the image that is not defined by an AREA tag is assumed to be NOHREF.
The
HREF Attribute
An
HREF Attribute specifies where a click in that area should lead.
The
NOHREF attribute
The
NOHREF attribute indicates that clicks in this region should perform no action.
The
SHAPE Attribute
The
SHAPE gives the shape of this area. Currently the shapes
"RECT", "CIRCLE" and "POLY" are supported , with
RECT being the default shape, if an explicit SHAPE attribute is not specified.
The
COORDS attribute
The
COORDS attribute gives the co-ordinates of the shape, using image pixels as the
units. For a rectangle (SHAPE="RECT"), the
COORDS are expressed as
"left-x,top-y,right-x,bottom-y". For a circle,
(SHAPE="CIRCLE"), the COORDS are expressed as "centre-x,
centre-y, radius" and for a polygon(SHAPE="POLY") (an
irregular shape), the COORDS are expressed in pairs of coordinates (i.e.
"x1,y1,x2,y2,x3,y3... ") which defines the pixel coordinates of the
various points of the polygonal image hotspot.
NOTE: - The TARGET attribute can be used within
the <AREA> element, allowing the use of Client side image maps within
framed documents.
Points to remember
Tag
|
Description
|
<img>
|
Defines
an image
|
<map>
|
Defines
an image map
|
<area>
|
Defines
a clickable area inside an image map
|
Tag
|
Description
|
<a>
|
Defines
an anchor
|
Exercise 1 : -
Make
a hyperlink of an image
This example demonstrates how to use an image as a link.
This example demonstrates how to use an image as a link.
<html>
<body>
<p>
You
can also use an image as a link:
<a
href="lastpage.htm">
<img
border="0" src="buttonnext.gif" width="65"
height="38">
</a>
</p>
</body>
</html>
Exercise 2 : -
Create
an image map
This example demonstrates how to create an image map, with clickable regions. Each of the regions is a hyperlink.
This example demonstrates how to create an image map, with clickable regions. Each of the regions is a hyperlink.
<html>
<body>
<p>
Click
on one of the planets to watch it closer:
</p>
<img
src="planets.gif"
width="145"
height="126"
usemap="#planetmap">
<map
id="planetmap" name="planetmap">
<area
shape="rect"
coords="0,0,82,126"
alt="Sun"
href="sun.htm">
<area
shape="circle"
coords="90,58,3"
alt="Mercury"
href="mercur.htm">
<area
shape="circle"
coords="124,58,8"
alt="Venus"
href="venus.htm">
</map>
<p>
<b>Note:</b>
We use both an <b>id</b> and a <b>name</b> attribute in
the map tag
because
some versions of Netscape don't understand the id attribute.</p>
</body>
</html>
Exercise 3 : -
Turn
an image into an image map
This example demonstrates how to turn an image into an image map. You will see that if you move the mouse over the image, the coordinates will be displayed on the status bar.
This example demonstrates how to turn an image into an image map. You will see that if you move the mouse over the image, the coordinates will be displayed on the status bar.
<html>
<body>
<p>
Move
the mouse over the image, and look at the status bar to see how the
coordinates
change.
</p>
<p>
<a
href="tryhtml_ismap.htm">
<img
src="planets.gif"
ismap
width="146" height="126">
</a>
</p>
</body>
</html>
Tables
<TABLE> ... </TABLE> Tag
Tables
are defined with the <table> tag. A table is divided into rows (with the
<tr> tag), and each row is divided into data cells (with the <td>
tag). The letters td stands for "table data," which is the content of
a data cell. A data cell can contain text, images, lists, paragraphs, forms,
horizontal rules, tables, etc.
This
is the main wrapper for all the other table elements, and other table elements
will be ignored if they aren't wrapped inside of a <TABLE> ...
</TABLE> element.
The
BORDER Attribute
To
display a table with borders, you will have to use the border attribute. If you
do not specify a border attribute the table will be displayed without any
borders. Sometimes this can be useful, but most of the time, you want the
borders to show.
The CELLSPACING
Attribute
This
attribute allows control over the space used between cells in a
table. The value should be a pixel value.
The
CELLPADDING Attribute
This
attribute allows control over the space inserted between the cell data and cell
wall in a table. The value should be a pixel value.
Example
:-
<TABLE
BORDER=0 CELLSPACING=0 CELLPADDING=0>
0
The
WIDTH Attribute
This
attribute is used to describe the desired width of this table, either as an
absolute width in pixels, or a percentage of document width.
The
HEIGHT Attribute
This
attribute describes the height of the table, either as a particular pixel
value, or as a percentage of the display window.
Example
:-
<TABLE
BORDER=1 WIDTH=400 HEIGHT=200>
<TABLE
BORDER=1 WIDTH=40% HEIGHT=20%>
The
ALIGN Attribute
it
allows a table to be aligned to the left or right of the page, allowing text to
flow around the table.
The
BGCOLOR Attribute
It
allows the background color of the table to be specified, using either the
specified color names, or a rrggbb hex triplet.
The
BORDERCOLOR Attribute
This
attribute used to set the border color of the table.
NOTE: - The BGCOLOR and
BORDERCOLOR attributes can also be used in <TH>, <TR> and
<TD> elements.
The
BACKGROUND Attribute
Internet
Explorer supports the placing of images inside the <TABLE> element. (Also
in the <TD> and <TH> elements) If used in the
<TABLE> element, the image in question will be tiled behind all of the
table cells.
<TR ...> ... </TR> Tag
This
specifies a table row. The number of rows in a table is exactly
specified by how many <TR> elements are contained within it.
The
ROWSPAN attribute
ROWSPAN
attribute to span into non-specified rows.
The
ALIGN Attribute
This
controls whether text inside the table cell(s) is aligned to the left side of
the row, the right side of the cell, or centred within the
cell. Values are left, center, and right.
The
VALIGN Attribute
This
attribute controls whether text inside the table cell(s) is aligned to the top
of the row, the bottom of the cell, or vertically centred within the
cell. It can also specify that all the cells in the row should be
vertically aligned to the same baseline. Values are top, middle,
bottom and baseline.
<TH ...> ... </TH> Tag
This
stands for table header. Header cells are identical to data cells in
all respects, with the exception that header cells are in a bold FONT, and have
a default ALIGN=center.
<TH ...> ... </TH> can contain the following
attributes :-
ALIGN,
VALIGN, WIDTH, HEIGHT, NOWRAP, COLSPAN, ROWSPAN, etc.
<TD ...> ... </TD> Tag
This
stands for table data, and specifies a standard table data
cell. Table data cells must only appear within table
rows. Each row need not have the same number of cells specified as
short rows will be padded with blank cells on the right. A cell can
contain any of the HTML elements normally present in the body of an HTML
document.
The ALIGN Attribute
This
attribute controls whether text inside the table cell(s) is aligned to the left
side of the cell, the right side of the cell, or centred within the
cell. Values are left, center, and right.
The VALIGN Attribute
The
VALIGN attribute controls whether text inside the table cell(s) is aligned to
the top of the cell, the bottom of the cell, or vertically centred within the
cell. It can also specify that all the cells in the row should be
vertically aligned to the same baseline. Values are top, middle,
bottom and baseline.
The WIDTH Attribute
This
attribute is used to describe the desired width of the cell, either as an
absolute width in pixels, or a percentage of table width.
The HEIGHT Attribute
This
attribute describes the height of the cell, either as a particular pixel value,
or as a percentage of the table width.
The NOWRAP Attribute
If
this attribute appears in any table cell (<TH> or <TD>) it means
the lines within this cell cannot be broken to fit the width of the
cell. Be cautious in use of this attribute as it can result in
excessively wide cells.
The COLSPAN Attribute
This
attribute can appear in any table cell (<TH> or <TD>) and it
specifies how many columns of the table this cell should span. The
default COLSPAN for any cell is 1.
The ROWSPAN Attribute
This
attribute can appear in any table cell (<TH> or <TD>) and it
specifies how many rows of the table this cell should span. The
default ROWSPAN for any cell is 1. A span that extends into rows
that were never specified with a <TR> will be truncated.
Example: -
<table border="1">
<tr>
<td>Row 1, cell 1</td>
<td>Row 1, cell 2</td>
</tr>
</table>
Example:
-
<table border="1">
<tr>
<th>Heading</th>
<th>Another Heading</th>
</tr>
<tr>
<td>row 1, cell 1</td>
<td>row 1, cell 2</td>
</tr>
<tr>
<td>row 2, cell 1</td>
<td>row 2, cell 2</td>
</tr>
</table>
Points to remember
Tag
|
Description
|
<table>
|
Defines
a table
|
<th>
|
Defines
a table header
|
<tr>
|
Defines
a table row
|
<td>
|
Defines
a table cell
|
<caption>
|
Defines
a table caption
|
<colgroup>
|
Defines
groups of table columns
|
<col>
|
Defines
the attribute values for one or more columns in a table
|
<thead>
|
Defines
a table head
|
<tbody>
|
Defines
a table body
|
<tfoot>
|
Defines
a table footer
|
Exercise
1 :-
Tables
This
example demonstrates how to create tables in an HTML document.
<html>
<body>
<p>
Each
table starts with a table tag.
Each
table row starts with a tr tag.
Each
table data starts with a td tag.
</p>
<h4>One
column:</h4>
<table
border="1">
<tr>
<td>100</td>
</tr>
</table>
<h4>One
row and three columns:</h4>
<table
border="1">
<tr>
<td>100</td>
<td>200</td>
<td>300</td>
</tr>
</table>
<h4>Two
rows and three columns:</h4>
<table
border="1">
<tr>
<td>100</td>
<td>200</td>
<td>300</td>
</tr>
<tr>
<td>400</td>
<td>500</td>
<td>600</td>
</tr>
</table>
</body>
</html>
Exercise 2 :-
Table
borders
This
example demonstrates different table borders.
<html>
<body>
<h4>With
a normal border:</h4>
<table
border="1">
<tr>
<td>First</td>
<td>Row</td>
</tr>
<tr>
<td>Second</td>
<td>Row</td>
</tr>
</table>
<h4>With
a thick border:</h4>
<table
border="8">
<tr>
<td>First</td>
<td>Row</td>
</tr>
<tr>
<td>Second</td>
<td>Row</td>
</tr>
</table>
<h4>With
a very thick border:</h4>
<table
border="15">
<tr>
<td>First</td>
<td>Row</td>
</tr>
<tr>
<td>Second</td>
<td>Row</td>
</tr>
</table>
</body>
</html>
Exercise 3 :-
Table
with no border
This
example demonstrates a table with no borders.
<html>
<body>
<h4>This
table has no borders:</h4>
<table>
<tr>
<td>100</td>
<td>200</td>
<td>300</td>
</tr>
<tr>
<td>400</td>
<td>500</td>
<td>600</td>
</tr>
</table>
<h4>And
this table has no borders:</h4>
<table
border="0">
<tr>
<td>100</td>
<td>200</td>
<td>300</td>
</tr>
<tr>
<td>400</td>
<td>500</td>
<td>600</td>
</tr>
</table>
</body>
</html>
Exercise 4 :-
Headings
in a table
This
example demonstrates how to display table headers.
<html>
<body>
<h4>Table
headers:</h4>
<table
border="1">
<tr>
<th>Name</th>
<th>Telephone</th>
<th>Telephone</th>
</tr>
<tr>
<td>Bill
Gates</td>
<td>555
77 854</td>
<td>555
77 855</td>
</tr>
</table>
<h4>Vertical
headers:</h4>
<table
border="1">
<tr>
<th>First
Name:</th>
<td>Bill
Gates</td>
</tr>
<tr>
<th>Telephone:</th>
<td>555
77 854</td>
</tr>
<tr>
<th>Telephone:</th>
<td>555
77 855</td>
</tr>
</table>
</body>
</html>
Exercise 5 :-
Empty
cells
This
example demonstrates how to use " " to handle cells that
have no content.
<html>
<body>
<table
border="1">
<tr>
<td>Some
text</td>
<td>Some
text</td>
</tr>
<tr>
<td></td>
<td>Some
text</td>
</tr>
</table>
<p>
As
you can see, one of the cells has no border. That is because it is empty. Try
to insert a space in the cell. Still it has no border.
</p>
<p>
The
trick is to insert a no-breaking space in the cell.
</p>
<p>No-breaking
space is a character entity. If you don't know what a character entity is, read
the chapter about it.
</p>
<p>The
no-breaking space entity starts with an ampersand ("&"),
then
the letters "nbsp", and ends with a semicolon (";")
</p>
<p>
</p>
</body>
</html>
Exercise 6 :-
Table
with a caption
This
example demonstrates a table with a caption.
<html>
<body>
<h4>
This
table has a caption,
and
a thick border:
</h4>
<table
border="6">
<caption>My
Caption</caption>
<tr>
<td>100</td>
<td>200</td>
<td>300</td>
</tr>
<tr>
<td>400</td>
<td>500</td>
<td>600</td>
</tr>
</table>
</body>
</html>
Exercise 7 :-
Table
cells that span more than one row/column
This
example demonstrates how to define table cells that span more than one row or
one column.
<html>
<body>
<h4>Cell
that spans two columns:</h4>
<table
border="1">
<tr>
<th>Name</th>
<th
colspan="2">Telephone</th>
</tr>
<tr>
<td>Bill
Gates</td>
<td>555
77 854</td>
<td>555
77 855</td>
</tr>
</table>
<h4>Cell
that spans two rows:</h4>
<table
border="1">
<tr>
<th>First
Name:</th>
<td>Bill
Gates</td>
</tr>
<tr>
<th
rowspan="2">Telephone:</th>
<td>555
77 854</td>
</tr>
<tr>
<td>555
77 855</td>
</tr>
</table>
</body>
</html>
Exercise 8 :-
Tags
inside a table
This
example demonstrates how to display elements inside other elements.
<html>
<body>
<table
border="1">
<tr>
<td>
<p>This
is a paragraph</p>
<p>This
is another paragraph</p>
</td>
<td>This
cell contains a table:
<table
border="1">
<tr>
<td>A</td>
<td>B</td>
</tr>
<tr>
<td>C</td>
<td>D</td>
</tr>
</table>
</td>
</tr>
<tr>
<td>This
cell contains a list
<ul>
<li>apples</li>
<li>bananas</li>
<li>pineapples</li>
</ul>
</td>
<td>HELLO</td>
</tr>
</table>
</body>
</html>
Exercise 9 :-
Cell
padding
This
example demonstrates how to use cellpadding to create more white space between
the cell content and its borders.
<html>
<body>
<h4>Without
cellpadding:</h4>
<table
border="1">
<tr>
<td>First</td>
<td>Row</td>
</tr>
<tr>
<td>Second</td>
<td>Row</td>
</tr>
</table>
<h4>With
cellpadding:</h4>
<table
border="1"
cellpadding="10">
<tr>
<td>First</td>
<td>Row</td>
</tr>
<tr>
<td>Second</td>
<td>Row</td>
</tr>
</table>
Exercise 10 :-
Cell
spacing
This
example demonstrates how to use cellspacing to increase the distance between
the cells.
<html>
<body>
<h4>Without
cellspacing:</h4>
<table
border="1">
<tr>
<td>First</td>
<td>Row</td>
</tr>
<tr>
<td>Second</td>
<td>Row</td>
</tr>
</table>
<h4>With
cellspacing:</h4>
<table
border="1"
cellspacing="10">
<tr>
<td>First</td>
<td>Row</td>
</tr>
<tr>
<td>Second</td>
<td>Row</td>
</tr>
</table>
</body>
</html>
Exercise 11 :-
Add
a background color or a background image to a table
This
example demonstrates how to add a background to a table.
<html>
<body>
<h4>A
background color:</h4>
<table
border="1"
bgcolor="red">
<tr>
<td>First</td>
<td>Row</td>
</tr>
<tr>
<td>Second</td>
<td>Row</td>
</tr>
</table>
<h4>A
background image:</h4>
<table
border="1"
background="bgdesert.jpg">
<tr>
<td>First</td>
<td>Row</td>
</tr>
<tr>
<td>Second</td>
<td>Row</td>
</tr>
</table>
</body>
</html>
Exercise 12 :-
Add
a background color or a background image to a table cell
This
example demonstrates how to add a background to one or more table cells.
<html>
<body>
<h4>Cell
backgrounds:</h4>
<table
border="1">
<tr>
<td
bgcolor="red">First</td>
<td>Row</td>
</tr>
<tr>
<td
background="bgdesert.jpg">
Second</td>
<td>Row</td>
</tr>
</table>
</body>
</html>
Exercise 13 :-
Align
the content in a table cell
This example demonstrates how to use the "align" attribute to align the content of cells, to create a "nice-looking" table.
This example demonstrates how to use the "align" attribute to align the content of cells, to create a "nice-looking" table.
<html>
<body>
<table
width="400" border="1">
<tr>
<th
align="left">Money spent on....</th>
<th
align="right">January</th>
<th
align="right">February</th>
</tr>
<tr>
<td
align="left">Clothes</td>
<td
align="right">$241.10</td>
<td
align="right">$50.20</td>
</tr>
<tr>
<td
align="left">Make-Up</td>
<td
align="right">$30.00</td>
<td
align="right">$44.45</td>
</tr>
<tr>
<td
align="left">Food</td>
<td
align="right">$730.40</td>
<td
align="right">$650.00</td>
</tr>
<tr>
<th
align="left">Sum</th>
<th
align="right">$1001.50</th>
<th
align="right">$744.65</th>
</tr>
</table>
</body>
</html>
Exercise 14 :-
The
frame attribute
This
example demonstrates how to use the "frame" attribute to control the
borders around the table.
<html>
<body>
<p>
If
you see no frames around the tables in these examples, your browser is too old,
or does not support it.
</p>
<h4>With
frame="border":</h4>
<table
frame="border">
<tr>
<td>First</td>
<td>Row</td>
</tr>
<tr>
<td>Second</td>
<td>Row</td>
</tr>
</table>
<h4>With
frame="box":</h4>
<table
frame="box">
<tr>
<td>First</td>
<td>Row</td>
</tr>
<tr>
<td>Second</td>
<td>Row</td>
</tr>
</table>
<h4>With
frame="void":</h4>
<table
frame="void">
<tr>
<td>First</td>
<td>Row</td>
</tr>
<tr>
<td>Second</td>
<td>Row</td>
</tr>
</table>
<h4>With
frame="above":</h4>
<table
frame="above">
<tr>
<td>First</td>
<td>Row</td>
</tr>
<tr>
<td>Second</td>
<td>Row</td>
</tr>
</table>
<h4>With
frame="below":</h4>
<table
frame="below">
<tr>
<td>First</td>
<td>Row</td>
</tr>
<tr>
<td>Second</td>
<td>Row</td>
</tr>
</table>
<h4>With
frame="hsides":</h4>
<table
frame="hsides">
<tr>
<td>First</td>
<td>Row</td>
</tr>
<tr>
<td>Second</td>
<td>Row</td>
</tr>
</table>
<h4>With
frame="vsides":</h4>
<table
frame="vsides">
<tr>
<td>First</td>
<td>Row</td>
</tr>
<tr>
<td>Second</td>
<td>Row</td>
</tr>
</table>
<h4>With
frame="lhs":</h4>
<table
frame="lhs">
<tr>
<td>First</td>
<td>Row</td>
</tr>
<tr>
<td>Second</td>
<td>Row</td>
</tr>
</table>
<h4>With
frame="rhs":</h4>
<table
frame="rhs">
<tr>
<td>First</td>
<td>Row</td>
</tr>
<tr>
<td>Second</td>
<td>Row</td>
</tr>
</table>
</body>
</html>
Forms
<FORM> ... </FORM> Tag
The
Form element is used to delimit a data input form. There can be
several forms in a single document, but the Form element can't be nested.
A
form is an area that can contain form elements. Form elements are elements
that allow the user to enter information (like text fields, textarea fields,
drop-down menus, radio buttons, checkboxes, etc.) in a form.
The
ACTION attribute
The
ACTION attribute is a URL specifying the location to which the contents of the
form are submitted. When the user clicks on the "Submit" button,
the content of the form is sent to another file. The form's action attribute
defines the name of the file to send the content to. The file defined in the
action attribute usually does something with the received input.
The
METHOD attribute
The
METHOD attribute selects variations in the protocol. The default METHOD is GET,
although for many applications, the POST method may be preferred.
The
ENCTYPE Attribute
The
ENCTYPE attribute specifies the format of the submitted data in case the
protocol does not impose a format itself.
Note:
- When
the ACTION attribute is set to an HTTP URL, the METHOD attribute must be set to
an HTTP method as defined by the HTTP method specification in the IETF draft
HTTP standard. The default METHOD is GET, although for many applications, the
POST method may be preferred. With the post method, the ENCTYPE
attribute is a MIME type specifying the format of the posted data; by default,
is application/x-www-form-urlencoded.
Input
<INPUT> Tag
The
Input element represents a field whose contents may be edited by the user.
The
TYPE Attribute
Defines
the type of data the field accepts. Defaults to free text. Several types of
fields can be defined with the type attribute.
The
NAME Attribute
Symbolic
name used when transferring the form's contents. The NAME attribute is required
for most input types and is normally used to provide a unique identifier for a
field, or for a logically related group of fields.
The
VALUE Attribute
The
initial displayed value of the field, if it displays a textual or numerical
value; or the value to be returned when the field is selected, if it displays a
Boolean value. This attribute is required for radio buttons.
The
SIZE Attribute
Specifies
the size or precision of the field according to its type. For example, to
specify a field with a visible width of 24 characters.
Example
:-
INPUT TYPE=text SIZE="24"
The
MAXLENGTH Attribute
Indicates
the maximum number of characters that can be entered into a text field. This
can be greater than specified by the SIZE attribute, in which case the field
will scroll appropriately. The default number of characters is unlimited.
The
most used form tag is the <input> tag. The type of input is specified
with the type attribute. The most commonly used input types are explained
below.
Text: Text fields are used
when you want the user to type letters, numbers, etc. in a form.
<form>
First
name:
<input
type="text" name="firstname">
<br>
Last
name:
<input
type="text" name="lastname">
</form>
Note
that the form itself is not visible. Also note that in most browsers, the width
of the text field is 20 characters by default.
HIDDEN
: No
field is presented to the user, but the content of the field is sent with the
submitted form. This value may be used to transmit state information about
client/server interaction.
PASSWORD is the same as the
TEXT attribute, except that text is not displayed as it is entered.
TEXTAREA is used for
multiple-line text-entry fields. Use in conjunction with the SIZE and MAXLENGTH
attributes.
SUBMIT is a button that when
pressed submits the form. You can use the VALUE attribute to provide
a non- editable label to be displayed on the button.
RESET is a button that when
pressed resets the form's fields to their specified initial values. The label
to be displayed on the button may be specified just as for the SUBMIT button.
BUTTON is a button when
pressed it doesn’t perform any action by default. We need to write script to
specify what to do when button pressed.
RADIO is used for
attributes that accept a single value from a set of alternatives. Each radio
button field in the group should be given the same name. Only the selected
radio button in the group generates a name/value pair in the submitted data.
Radio buttons require an explicit VALUE attribute.
CHECKBOX
: Used
for simple Boolean attributes, or for attributes that can take multiple values
at the same time. Checkboxes are used when you want the user to select one
or more options of a limited number of choices.
IMAGE
: The
image itself is specified by the SRC attribute, exactly as for the Image
element. An image field upon which you can click with a pointing device, causing
the form to be immediately submitted. The co-ordinates of the selected point
are measured in pixel units from the upper-left corner of the image, and are
returned (along with the other contents of the form) in two name/value pairs.
The x-co-ordinate is submitted under the name of the field with .x appended,
and the y- co-ordinate is submitted under the name of the field with .y
appended. Any VALUE attribute is ignored.
Points to remember
Tag
|
Description
|
<form>
|
Defines
a form for user input
|
<input>
|
Defines
an input field
|
<textarea>
|
Defines
a text-area (a multi-line text input control)
|
<label>
|
Defines
a label to a control
|
<fieldset>
|
Defines
a fieldset
|
<legend>
|
Defines
a caption for a fieldset
|
<select>
|
Defines
a selectable list (a drop-down box)
|
<optgroup>
|
Defines
an option group
|
<option>
|
Defines
an option in the drop-down box
|
<button>
|
Defines
a push button
|
<isindex>
|
Deprecated.
Use <input> instead
|
Example
1 :-
Text
fields
<html>
<body>
<form>
First
name:
<input
type="text" name="firstname">
<br>
Last
name:
<input
type="text" name="lastname">
</form>
</body>
</html>
Example 2 :-
Password
fields
<html>
<body>
<form>
Username:
<input
type="text" name="user">
<br>
Password:
<input
type="password" name="password">
</form>
<p>
Note
that when you type characters in a password field, the browser displays
asterisks or bullets instead of the characters.
</p>
</body>
</html>
Example 3 :-
Checkboxes
<html>
<body>
<form>
I
have a bike:
<input
type="checkbox" name="Bike">
<br>
I
have a car:
<input
type="checkbox" name="Car">
</form>
</body>
</html>
Example 4 :-
Radiobuttons
<html>
<body>
<form>
Male:
<input
type="radio" checked="checked"
name="Sex"
value="male">
<br>
Female:
<input
type="radio"
name="Sex"
value="female">
</form>
<p>
When
a user clicks on a radio-button, the button becomes checked, and all other
buttons with the same name become unchecked
</p>
</body>
</html>
Example 5 :-
Simple
drop down box
<html>
<body>
<form>
<select
name="cars">
<option
value="volvo">Volvo
<option
value="saab">Saab
<option
value="fiat">Fiat
<option
value="audi">Audi
</select>
</form>
</body>
</html>
Example 6 :-
Another
drop down box
<html>
<body>
<form>
<select
name="cars">
<option
value="volvo">Volvo
<option
value="saab">Saab
<option
value="fiat" selected="selected">Fiat
<option
value="audi">Audi
</select>
</form>
</body>
</html>
Example
7 :-
Create
a button
<html>
<body>
<form>
<input
type="button" value="Hello world!">
</form>
</body>
</html>
Example
8 :-
Fieldset
around data
<html>
<body>
<fieldset>
<legend>
Health
information:
</legend>
<form>
Height
<input type="text" size="3">
Weight
<input type="text" size="3">
</form>
</fieldset>
<p>
If
there is no border around the input form, your browser is too old.
</p>
</body>
</html>
Example
9 :-
Form
with input fields and a submit button
<html>
<body>
<form
name="input" action="html_form_action.asp"
method="get">
Type
your first name:
<input
type="text" name="FirstName" value="Mickey"
size="20">
<br>Type
your last name:
<input
type="text" name="LastName" value="Mouse"
size="20">
<br>
<input
type="submit" value="Submit">
</form>
<p>
If
you click the "Submit" button, you will send your input to a new page
called html_form_action.asp.
</p>
</body>
</html>
Example
10 :-
Form
with checkboxes
<html>
<body>
<form
name="input" action="html_form_action.asp"
method="get">
I
have a bike:
<input
type="checkbox" name="Bike"
checked="checked"><br>
I
have a car:
<input
type="checkbox" name="Car">
<br>
<input
type="submit" value="Submit">
</form>
<p>
If
you click the "Submit" button, you send your input to a new page
called html_form_action.asp.
</p>
</body>
</html>
Example
11 :-
Form
with radio buttons
<html>
<body>
<form
name="input" action="html_form_action.asp" method="get">
Male:
<input
type="radio" name="Sex" value="Male"
checked="checked">
<br>
Female:
<input
type="radio" name="Sex" value="Female">
<br>
<input
type ="submit" value ="Submit">
</form>
<p>
If
you click the "Submit" button, you will send your input to a new page
called html_form_action.asp.
</p>
</body>
</html>
Example
12 :-
Send
e-mail from a form
<html>
<body>
<form
action="MAILTO:someone@w3schools.com" method="post"
enctype="text/plain">
<h3>This
form sends an e-mail to W3Schools.</h3>
Name:<br>
<input
type="text" name="name"
value="yourname"
size="20">
<br>
Mail:<br>
<input
type="text" name="mail"
value="yourmail"
size="20">
<br>
Comment:<br>
<input
type="text" name="comment"
value="yourcomment"
size="40">
<br><br>
<input
type="submit" value="Send">
<input
type="reset" value="Reset">
</form>
</body>
</html>
Frames
With
frames, you can display more than one HTML document in the same browser window.
Each HTML document is called a frame, and each frame is independent of the others.
The
disadvantages of using frames are:
- The
web developer must keep track of more HTML documents
- It
is difficult to print the entire page
<FRAMESET> Tag
The
<frameset> tag defines how to divide the window into frames each frameset
defines a set of rows or columns. The values of the
rows/columns indicate the amount of screen area each row/column will occupy.
The ROWS attribute
The
ROWS attribute takes as its value a comma separated list of values. These
values can be absolute pixel values, percentage values between 1 and 100, or
relative scaling values. The number of rows is implicit in the number of
elements in the list.
Example
for 3 rows, the first and the last being smaller than the centre row:
<FRAMESET
ROWS="20%,60%,20%">
Example
for 3 rows, the first and the last being fixed height, with the remaining space
assigned to the middle row:
<FRAMESET
ROWS="100,*,100">
The
COLS attribute
The
COLS attribute takes as its value a comma separated list of values that is of
the exact same syntax as the list described above for the ROWS attribute.
The
BORDER Attribute
It
accepts a pixel value, which determines the thickness of any borders used
within the frame set.
<FRAME> Tag
This
tag defines a single frame in a frameset. It has 6 possible attributes.
The
SRC attribute
The
SRC attribute takes as its value the URL of the document to be displayed in
this particular frame. FRAMEs without SRC attributes are displayed as a blank
space the size the frame would have been.
The
NAME attribute
The
NAME attribute is used to assign a name to a frame so it can be targeted by
links in other documents (These are usually from other frames in the same
document.) The NAME attribute is optional; by default all windows are unnamed.
Names
must begin with an alphanumeric character. However, several reserved names have
been defined, which start with an underscore.
These
are currently:
_blank Always
load this link into a new, unnamed window.
_self Always
load this link over yourself.
_parent Always
load this link over your parent. (becomes self if you have no
parent).
_top Always
load this link at the top level. (becomes self if you are at the
top).
The MARGINWIDTH attribute
The
MARGINWIDTH attribute is used when the document author wants some control of
the margins for this frame. If specified, the value for MARGINWIDTH is in
pixels. Margins can not be less than one-so that frame objects will not touch
frame edges-and can not be specified so that there is no space for the document
contents. The MARGINWIDTH attribute is optional; by default, all frames default
to letting the browser decide on an appropriate margin width.
The MARGINHEIGHT attribute
The
MARGINHEIGHT attribute is just like MARGINWIDTH above, except it controls the
upper and lower margins instead of the left and right margins.
The SCROLLING attribute
The
SCROLLING attribute is used to describe if the frame should have a scrollbar or
not. Yes results in scrollbars always being visible on that frame. No results
in scrollbars never being visible. Auto instructs the browser to decide whether
scrollbars are needed, and place them where necessary. The SCROLLING attribute
is optional; the default value is auto.
The NORESIZE attribute
The
NORESIZE attribute has no value. It is a flag that indicates that the frame is
not resizable by the user. Users typically resize frames by dragging a frame
edge to a new position. Note that if any frame adjacent to an edge is not
resizable, that entire edge will be restricted from moving. This will effect
the resizability of other frames. The NORESIZE attribute is
optional; by default all frames are resizable.
Example 1 :-
Vertical
frameset
<html>
<frameset
cols="25%,50%,25%">
<frame
src="frame_a.htm">
<frame
src="frame_b.htm">
<frame
src="frame_c.htm">
</frameset>
</html>
Example 2 :-
Horizontal
frameset
<html>
<frameset
rows="25%,50%,25%">
<frame
src="frame_a.htm">
<frame
src="frame_b.htm">
<frame
src="frame_c.htm">
</frameset>
</html>
Example 3 :-
How
to use the <noframes> tag
<html>
<frameset
cols="25%,50%,25%">
<frame
src="frame_a.htm">
<frame
src="frame_b.htm">
<frame
src="frame_c.htm">
<noframes>
<body>Your
browser does not
handle
frames!</body>
</noframes>
</frameset>
</html>
Example 4 :-
Mixed
frameset
<html>
<frameset
rows="50%,50%">
<frame
src="frame_a.htm">
<frameset
cols="25%,75%">
<frame
src="frame_b.htm">
<frame
src="frame_c.htm">
</frameset>
</frameset>
</html>
Example 5 :-
Frameset
with noresize="noresize"
<html>
<frameset
rows="50%,50%">
<frame
noresize="noresize" src="frame_a.htm">
<frameset
cols="25%,75%">
<frame
noresize="noresize" src="frame_b.htm">
<frame
noresize="noresize" src="frame_c.htm">
</frameset>
</frameset>
</html>
Example 6 :-
Navigation
frame
<html>
<frameset
cols="120,*">
<frame
src="tryhtml_contents.htm">
<frame
src="frame_a.htm"
name="showframe">
</frameset>
</html>
Example 7 :-
Inline
frame
<html>
<body>
<iframe
src="default.asp"></iframe>
<p>Some
older browsers don't support iframes.</p>
<p>If
they don't, the iframe will not be visible.</p>
</body>
</html>
Example 8 :-
Jump
to a specified section within a frame
<html>
<frameset
cols="20%,80%">
<frame
src="frame_a.htm">
<frame
src="link.htm#C10">
</frameset>
</html>
Example 9 :-
Jump
to a specified section with frame navigation
<html>
<frameset
cols="180,*">
<frame
src="content.htm">
<frame
src="link.htm" name="showframe">
</frameset>
</html>
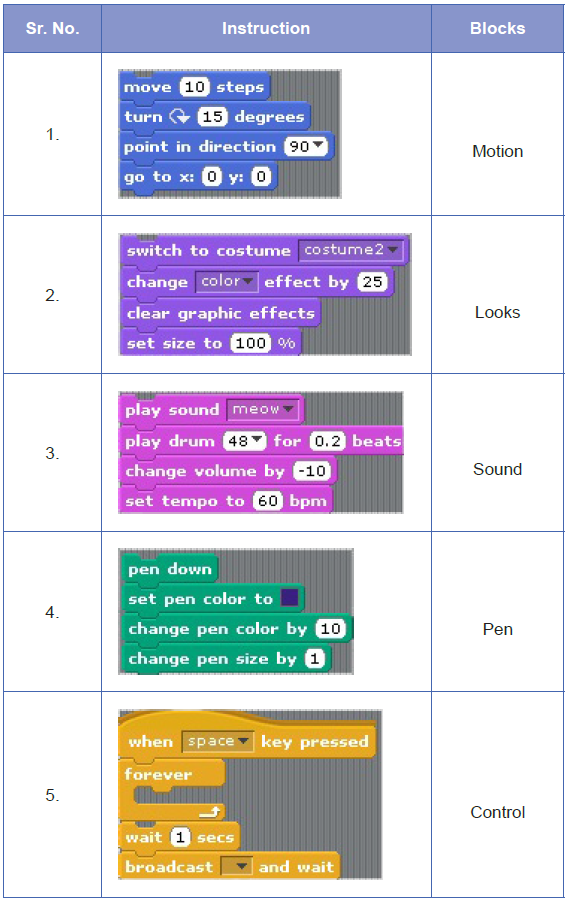


The blog is good.I got a more knowledge from this article.Thanks.
ReplyDeletejavascript training in chennai
javascript training institute in chennai
core java training in chennai
core java training institutes in chennai
C C++ Training in Chennai
C Language Training in Chennai
core java training in chennai
Best core java Training in Chennai